Republished with permission from the Spring 2016 issue of Fourteener Motoring Magazine.
Originally this project started as a quick “clean-up.” We planned to paint the car, replace some rubber, and build a new engine. “It will be done in a few months, in time for Hershey,” I said. Hershey 2015, that is. Over the past year, as these types of projects often do, it turned into a much more extensive build. Not only did we miss the initial planned completion date, Okteenerfest last year and Hershey 2016 came and went, without the car being done, as well.
I don’t regret any of the major decisons we made along the way. And we have learned a lot. But, we are ready to get the car back on the road. To make sure that we didn’t run into any more major hurdles that would keep us from completing the car for the summer, we spent about a month compiling parts and solving the little problems that I knew would slow us down. For example, at some point along the way, the wheel lug lock key had gotten lost. Resolving that issue turned out to be a much larger fiasco than I could have ever imagined. Chapter 7 of the Project Car, available at fourteenermotoring.com, outlines the steps we took to prepare for the final stretch to complete the build.
Now it is time for the fun stuff. Shiny parts. Just as we had a goal as to when we wanted to complete the car, we also had a budget. Much like the time horizon, the budget has long since been thrown out as well. Most experienced restorers will tell you to double whatever you think it will cost, and you might be close. They’re dead on.
Why does it cost twice as much as expected? Poor planning? Maybe. But, probably not. There are a number of reasons restoration of cars run over budget. First – surprises. Although most of the costs can be estimated ahead of time, you always encounter unexpected turns of events. Hidden rust. Broken parts. Higher than expected costs. But, I am convinved that this isn’t the primary thing that causes this type of project to run over budget.
The main cost overrun culprit that we encountered was “project creep.” We pulled the pedal assembly to paint the floor pans, and we couldn’t resist having the pedals rebuilt. After painting the car it needs new rubber, of course. Take the PORSCHE lettering off the engine grill, and we have to use new speed nuts to put it back on. You get the idea.
Simply put – after putting time, energy, and money into restoring a car, it becomes very difficult to install used parts on it. As this build became more in depth, it soon grew much more than a simple, quick “clean-up.” Along the way, the creep added a year to what was initially a three month project. Major regrets? None. Is it time to get to enjoying the car? Definitley.
So with an eye toward finishing the 914 fairly quickly, as well as trying to stay at least remotely connected to a reasonable budget, what do we replace as we complete the build? Our approach was first to focus on anything that went on top of the new exterior paint. We tried to replace these peices with new, or like new, parts. All of the lenses were replaced with NOS or very good condition units. We replaced the door rubber and top seals. We cleaned up and reused the mirrors and door handles which, thankfully, did not need to be replaced. But, to keep things looking crisp we used new mirror and door handle rubber.
Our second pass at deciding what to replace, after focusing on new parts on the exterior, was to consider what would be difficult to replace later. For example, we replaced the metal, door squeezy runners and the window rollers with aftermarket pieces. In the engine we went with new valves, flywheel bearing, motor mounts, and other bits and pieces that are hard to get to once the engine is in the car. We installed a refurbished alternator simply because it is so difficult to change once the engine is in the car.
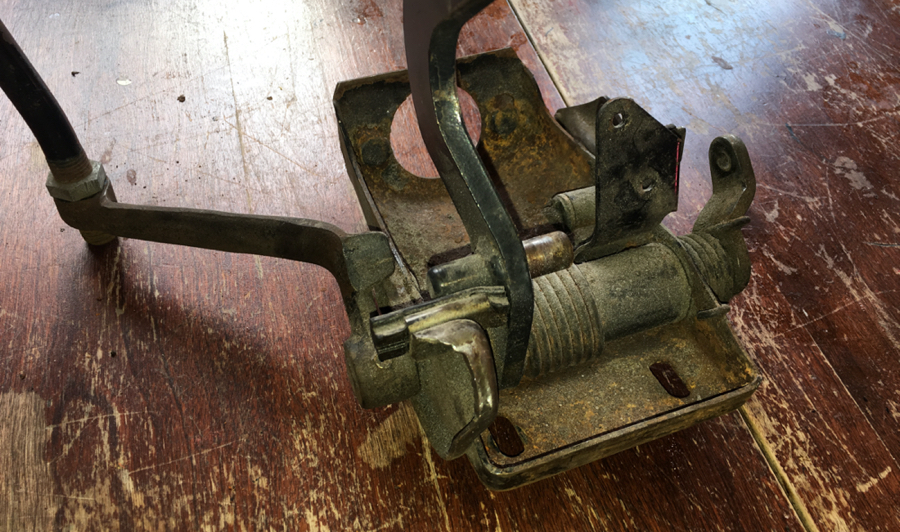
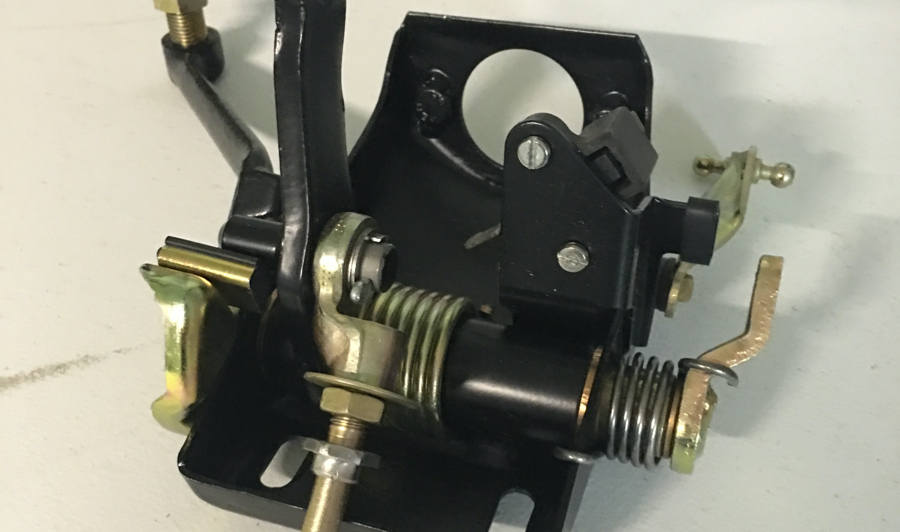
As mentioned before, once we got the pedal cluster out of the car to paint the floor pans, we couldn’t resist having Bruce Stone (bdstone914 on 914world.com) refurbish the assembly. When it arrived in the mail, after he worked his magic, it was better than new. At this point, I can’t imagine pulling an old one out without having it rebuilt.
We purchased Pedrini wheels from 914 Limited for the car. We debated for a year whether to paint them or have them powder coated. Painting would allow us to touch them up later, as well as give us a chance to fill any imperfections. Powder coating, on the other hand, provides a durable finish and is an easy solution.
However, I also read alot about chipping of powder coated wheels. In addition, the powder coater told us that we would not be able to fill any imperfections in the wheels, and that the coating is so thin that the larger ones in the 40-year-old wheels would show through the paint. What to do?
In the end, we decided to go with powder coating. We took the wheels to H.M. Elliott, Inc. in Mooresville, North Carolina (hmelliottcoatings.com), the same company that did the engine tin, and other parts for the car.
Powder coating differs from other painting methods in that it does not use a liquid solvent to carry the paint onto the surface. Instead, the paint is applied in a dry powder form. This dry application allows for thicker coats without running, and the creation of a harder finish.

 The process involves first media blasting the part. Then the poweder coating can be applied. Because the paint is applied dry, it cannot be sprayed on. The paint must be applied electrostatically to make it stick to the surface until it cures. This means the paint particles are given a positive charge while the object being painted is grounded.

 Once all the paint is applied, the object is heated to melt, and then cure, the paint. Simply melting the paint is not enough, though. It has to be heated further to allow the individual paint molecules to interconnect, and form a “skin.” The heat curing process is what gives powder coating a hard finish.

Below you can see the wheels after they were media blasted, and then the final product.
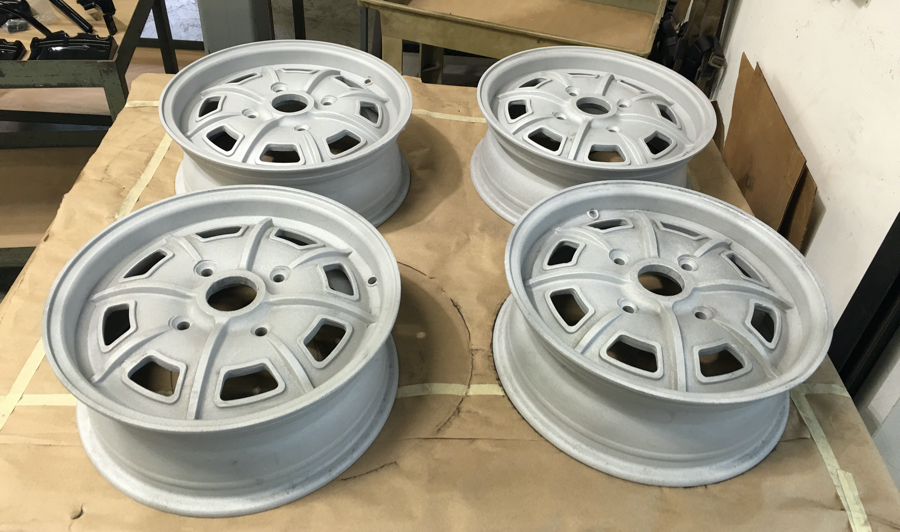
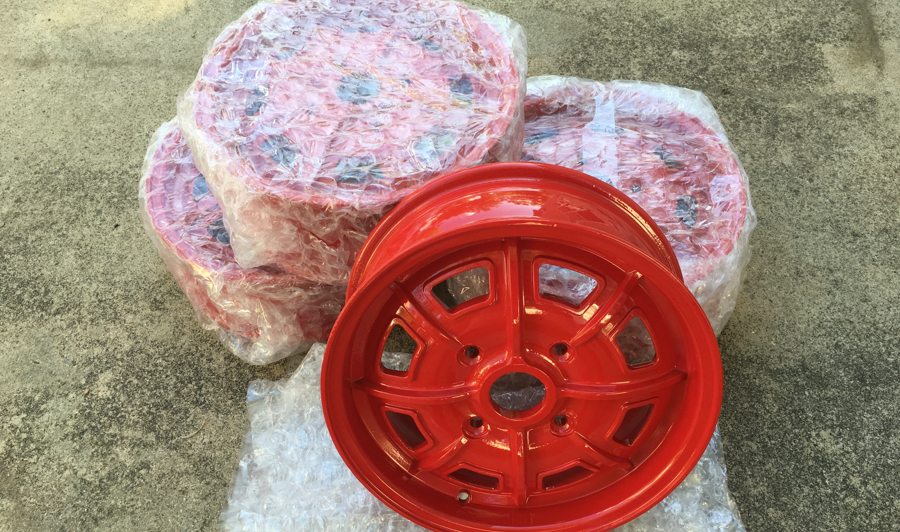
Once the wheels where media blasted and the metal was a consistent finish, many of the scratches went away. We ended up very happy with the results. They look great. You can see the finished wheels below.
We will be interested to see how they hold up in use. One of our primary concerns was that they will be difficult to touch-up if they get scratched. So the durabilty of the powder coating is of prime importance. We will let you know how well they stand up to hard driving.
Finishing the new engine is the other aspect of the project that got a lot of attention over the past couple months. In fact, it consumed a lot of our efforts on the car over the winter. You can read about the rebuild of the top-end of the engine in the How-To article in this issue.

What’s next? A lot of work. Most of what remains to be done is putting shiny parts on the car. Although this stage is fun, it is also stressful to try to keep from scratching everyting as it goes together.
In particular, we still have to finish reassembling the engine, and install it. Then we have to put the targa vinyl on the car, install all of the rubber and chrome, and tackle the interior. It will be a busy summer. But, the car should be ready for its public debut in time for Okteenerfest.
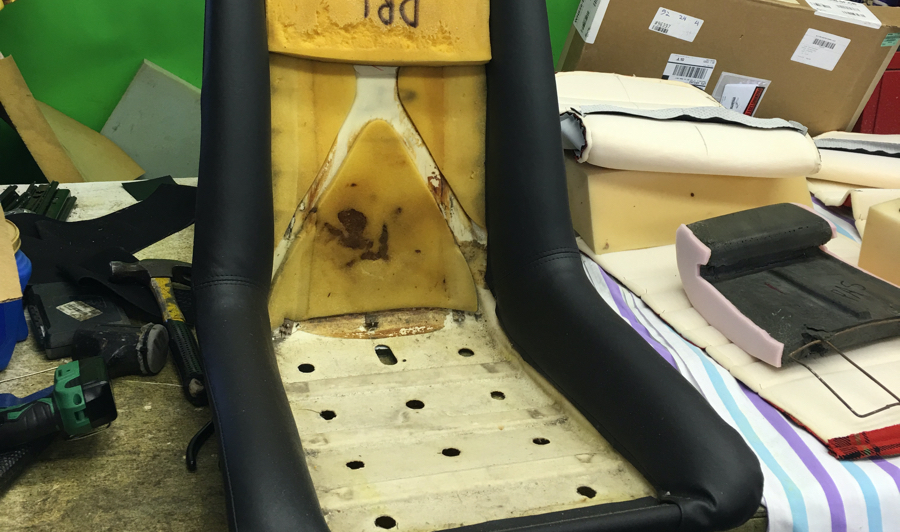
In the next issue we will cover the final touches, including having the seats recovered with 914rubber upholstery that we won in the raffle at Okteenerfest last year. To the right is a sneak peak of the new leather bolsters installed on the seats. We think you are going to like the finished product.
About The Author: Steve
More posts by Steve