Part 2: Pistons, Cylinders, and Top End Issues. Part I can be read here.
Republished with permission from the Spring 2016 issue of Fourteener Motoring Magazine.
In the last issue we did the rebuild of the lower end of the 2.0 liter engine for the 1972 project car. Once the bottom of the engine was together we began work on the top end.
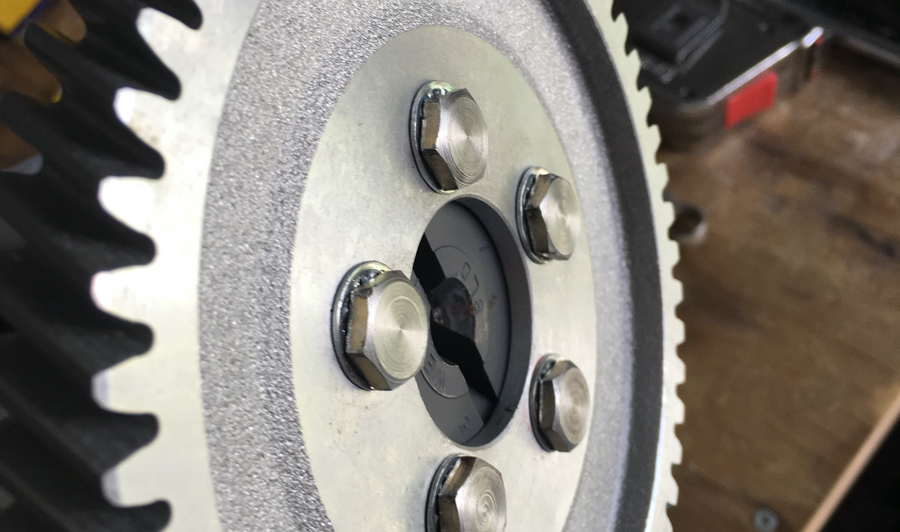
One of the first potential issues we encountered was the possibility that the cam gear bolt heads would impede the oil pump. We should have checked the clearance before putting the case halves together. But in the excitement to assemble the engine we overlooked it. The potential issue can be seen in the picture of a mocked up cam and oil pump below.
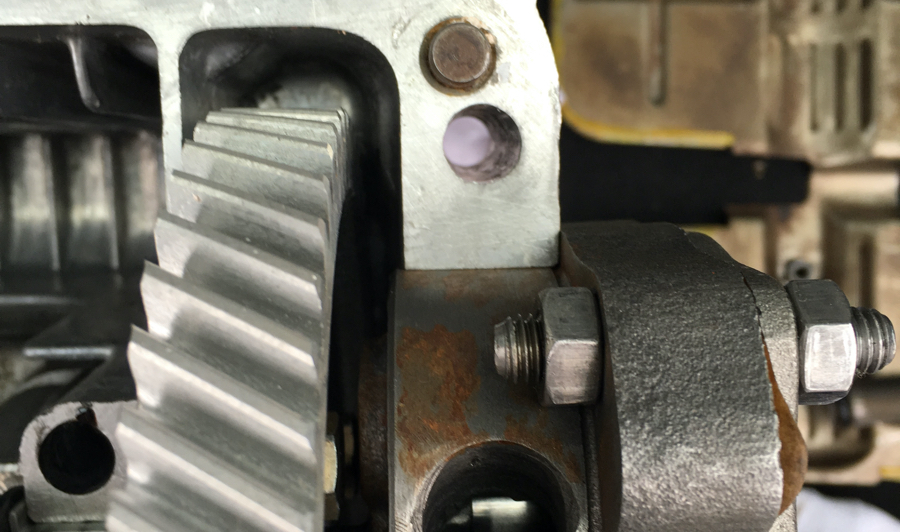
We made a quick call to Web Cams and learned that their cam gear is indented to solve this problem. In addition, the cam gear bolts they provided when we bought the cam and cam gear have low profile heads.
With that potential problem behind us, it was time to make some decisions about the pistons and cylinders.
Since this car is not going back together stock, we decided to increase the displacement of the 2.0 liter engine to 2056 cc. This is one of the easiest improvements that can be made to increase the horsepower of the powerplant. Especially if you are repalcing the pistons and cylinders anyway.
We chose to go with AA pistons and cylinders. Although we have heard conflicting reports related to their quality over the years, we have yet to have a problem with them. And we made sure to check the trueness of the cylinders, and the ring gaps. We ordered a set with Biral liners, and got a 15% discount by liking thier Facebook page.
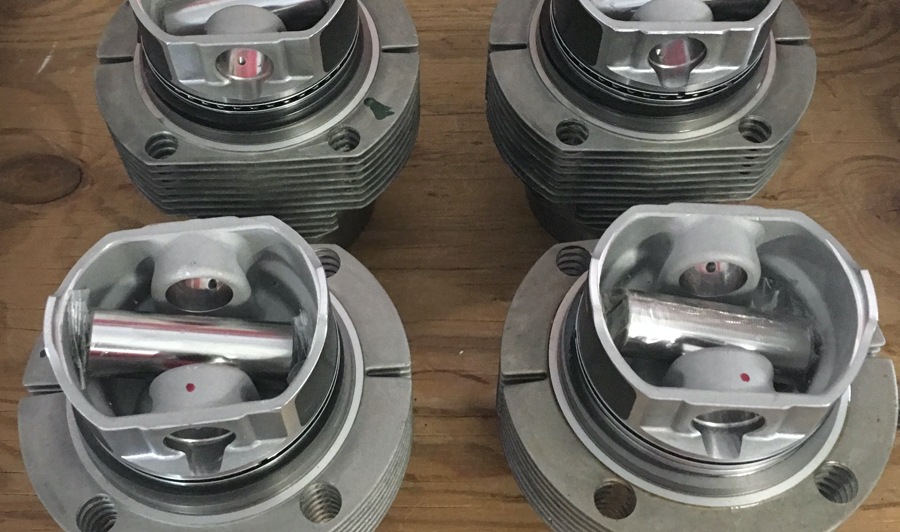
The pistons and cylinders come with everyting you need, including rings, wrist pins, and wrist pin clips. Note that while it used to be that pistons were marked with a dot to tell you which side goes closest to the flywheel, this is no longer the case on these units. They can be installed either way, as long as the valve reliefs are on the bottom. The red dot on the pistons is a mark from when they were matched by weight at the factory.
It is important to make sure you adjust the rings so that the gaps are postioned as AA recomends. Proper placement of the ring gaps ensures that no compression is lost and that the engine doesn’t smoke oil after sitting for a while.

Once the pistons and cylinders were installed, we began to address the heads. Many old-school engine builders say that the valve seats do not typically need to be replaced in 914 heads. Since ours looked good we left them alone. We did, however, have Black Forest Racing replace the valve guides. This is a job that only a professional should tackle. It is very easy to break the portion of the head that holds the guide, if they are not removed properly. We also replaced all of the valves in our heads since the existing ones were showing their age.
We encountered two issues when rebuilding our heads. First, we accidentally broke a spark plug off when trying to remove it. This problem consumed a great deal of time to resolve. The second issue we encountered involved the air injection tubes. Since we removed the air injection system we needed to plug the holes. As it turns out the thread for the holes is the sale as valve adjuster screws. So we were able to plug them using this method.


About The Author: Steve
More posts by Steve